Aug 29,2019 • Filed to: Record Audio • Proven solutions
If your Audacity midi won't play, how do you deal with it ?
MIDI (Musical Instrument Digital Interface) is a compact file format commonly used in playing keyboard instruments. It is a useful notes-based file format tool that stores the strength and duration of music. Audacity, on the other hand, supports MIDI. The features Audacity supports include the importing of MIDI files, cut-and-paste editing, and exporting files into MIDI. However, many users still encounter bugs and issues. There can still be some different instances when Audacity MIDI won't play. So here are some guides, tips, and solutions that will surely help you when annoying bugs get in your way.
Many users often have difficulties and encounter problems using Audacity as they don't know how to use it in the first place. To lessen problems, it is ideal that you know and master how to play MIDI with Audacity. Here is a step-by-step guide on how to play MIDI with Audacity. Make sure you follow each step thoroughly.
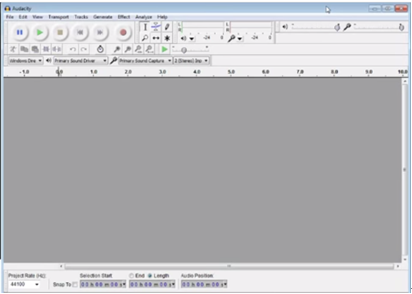
Step1. Open Audacity on your PC.
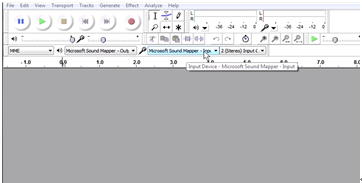
Step2. Check the Device Toolbar first to make sure that your sound system is tightly connected to your computer.
Step3. On the upper left corner of the window, you will see a red, circle-shaped button. It is the Record button. Click it to begin recording.
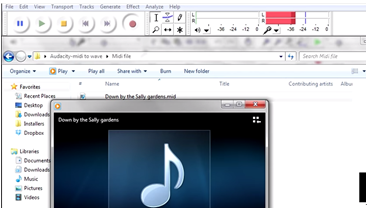
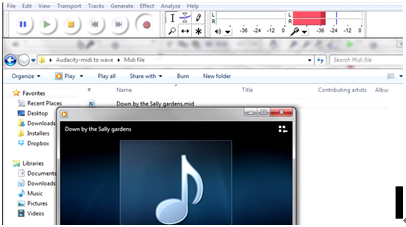
Step4. Open your MIDI file. Double-click your file so you can play it on your default player.
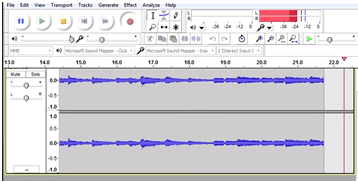
Step5. Digital waveforms will then appear in the main window of Audacity. Continue playing your MIDI file so Audacity can record it.
Step6. After your MIDI file ends, click the brown, circle-shaped Stop button you see at the upper left corner of Audacity's main window.
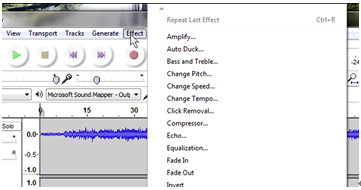
Step7. On the Audacity's menu bar, you will see the Effects. Click that to edit and enhance your recording.
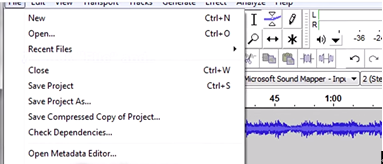
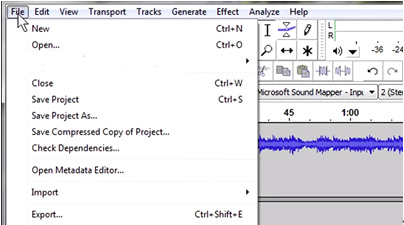
Step8. Go to Audacity's menu bar and then click File. Select Save Project or Save Project As to save your recording.
Though Audacity offers a wide variety of features, it can also have issues at times. Try and follow the following solutions for some common issues to get through each and every possible bug around.
No playback
Solution: if Audacity Playback still works after quitting and restarting it immediately, then there will be no heavy problem with that. Try to play a file in QuickTime twice or thrice, wait for minutes, and then open Audacity again. You will then be able to have Audacity playback again.
Crackling or choppy audio playback
Solution:
- Open Audacity on your PC.
- Go to preferences. Choose Quality and make sure to set Default Sample Rate to 44100 Hz.
- Set the Default Sample Format to 24 or 32-bit float.
- Set the Audio MIDI Setup to 44100 Hz 24-bit and 2-ch.
- If you can still hear crackling playback sound, use 16-bit Default Sample Format. Crackling annoying playback sound may be gone by then.
When trying to playback midi track, it says: Error while opening sound device
Solution: Since your problem is that Audacity fails to support the MIDI file format, try playing your MIDI file first and then recording it into Audacity.
Audacity really is a useful tool especially when it comes to converting file type to another like MP3, MIDI, Wav, and others. There can be instances where we badly need to convert our MP3 files to MIDI in school, at work, or so. Here is a very easy how-to guide on how to convert MP3 to MIDI with Audacity.
Step1. Download, launch, and open Audacity on your computer.
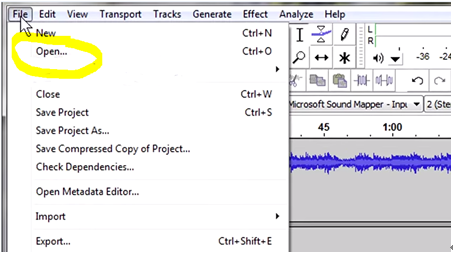
Step2. Go to the menu bar and then go to File. After that, select Open.
Step3. A dialog box will appear. There, find and select your MP3 file. Double-click it to play it in default.
Step4. After your MP3 file ends playing, go again to Audacity's menu bar and then go to File. Then, select Export…
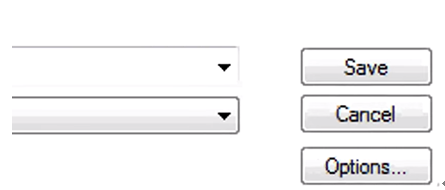
Step5. A dialog box will appear. Put the file name you want. In the Save as type, select the file type you want by clicking on the dropdown arrow. Since you want to convert your MP3 file to MIDI, click the Midi type. Then, click Save to save changes.
You heard that right! You can actually record the music of your midi keyboard with Audacity! As said, Audacity supports midi, including the import, edit, and export of midi files. As for midi, it is a perfect notes-based file format used in playing keyboard instruments, where commands of music's speed, volume, and notes are stored.
Only few people completely get the most out of using Audacity Midi keyboard as it takes much intelligence and tricks to control. So here are some tips about Audacity Midi Keyboard that will surely be helpful and effective for you.
- Since Audacity cannot read input from software yet, use hardware to input music. Speakers and midi keyboards are great examples of hardware.
- Successfully record audio by connecting a line from your head phone jack. Then, select your preferred song on the midi keyboard, click record in the Audacity window, and hit Play on your midi keyboard.
- To make your keyboard easily detected by the computer, open Audacity first before plugging in your USB cable to the PC. Audacity only detects devices that are available by the moment it starts up. If you've connected your midi keyboard before opening Audacity, your device will not easily be seen by the program. Moreover, you can restart Audacity. Your devices will be seen in your preferences then.
- To be able to record unlimited tracks from your midi keyboard, try starting with everything turned off, including the studio monitors, headphones, and even the midi keyboard itself.
- Purchase an external USB sound card with stereo line inputs to have a high-quality recording input.
iMusic is the best music downloader that works on Mac and Windows PC. It allows users to download music from over 3000 music sites by copying and pasting the URL of the music .For music played on radio stations, it can help users record the songs and get the music tag and covers automatically. It is a music tool if users really need to download music.
iMusic - All-in-One Music Transfer and Downloader
- Download music from more than 3000 music sites such as YouTube, Dailymotion, Vimeo, Vevo, Hulu, Spotify, and much more through copying and pasting the URLs.
- Transfer music between a computer, iPhone, iTunes Library, iPad, iPod and Android phones making it easy to share songs.
- Record music from radio stations and streaming sites and gets the identification of the songs including the title, album artist, and genre.
- It acts as a management toolbox that lets you manage iPad, iPod, iPhone and Android phones iTunes Library through options like backup iTunes, recover iTunes Library, fix iTunes music tags and covers as well as remove music DRM protection.
- Batch download of files is supported where you can download up to 100 songs at the same time.
- 1 click to transfer downloaded music and playlist to USB drive to enjoy in car.
- Ability to burn downloaded songs and playlists to CDs easily.
Steps to Download Music with iMusic
Step 1: Click “DOWNLOAD” in the “GET MUSIC” window. After then you can see a URL paste box as well as access to several popular music sites.

Step 2: Open YouTube or any music streaming site, for example Spotify. Copy the URL of the song on the site. Then paste the URL of the song to the URL paste box in iMusic, check the needed music format and click “Download”.

Another option for downloading is to navigate to the music site from those indicated below the URL blank, then search the music you want to download. Select the music format and quality, click “Download” to begin the download process as mentioned before.

Step 3: Once completed the download process, the downloaded songs will be automatically added to your iTunes Library automatically. Click "LIBRARY", then download icon on the left side to check out the songs.

Audio Recorder
- 1.1 Free Streaming Audio Recorder for Mac
- 1.2 Apple Music Recording Software
- 1.3 Free Audio CD Recorder Software
- 1.4 Free Audio Recorder Online Services
- 1.5 Audio Recording App for iPad& iPhone and Android
- 1.6 Free Recording Software for Mac /Windows
- 1.7 Free MP3 Recorder
- 1.8 Music Recording App
- 1.9 What Is the Music Recording Software
- 1.10 Video Recording Software for Mac and Windows
- 4.1 Audacity Apps for iPad& iPhone and Android
- 4.2 Audacity for Windows 10
- 4.3 Record Audio From Youtube With Audacity
- 4.4 Convert Audacity WMA to MP3
- 4.5 Audacity Multitrack Recording
- 4.6 Audacity Normalize Not Working
- 4.7 Audacity Keyboard Shortcuts
- 4.8 Audacity Stereo Mix Not Working
- 4.9 Make Sound Better in Audacity
- 4.10 Audacity Audio Recording and Editing
- 4.11 Audacity Midi Won't Play
- 4.12 Use Audacity to Edit and Record Video
- 4.13 Convert Audacity Flac to MP3
- 4.14 Tips on How to Use Audacity VST Enabler
- 4.15 FFMpeg Audacity Not Working
- 4.16 Troubleshooting on Using Audacity





Adam Cash
staff Editor
0 Comment(s)