Aug 29,2019 • Filed to: Record Audio • Proven solutions
When using Audacity to record or edit audio files, you may encounter some problems. The following are the 5 common Audacity troubleshooting on recording and editing and the solutions on how to solve them.
1. "Error while opening sound device"
When you are using Audacity on Windows operating system, you may get an error that says, "Error while opening sound device". You are likely to experience this problem when using Audacity for recording or editing for the first time and there are no input devices showing in the toolbar. It could be because of a problem with Audacity or your operating system.
To solve it, you will need to check Audacity settings by going to Help, and then Audio Device Info. Another way to check the sound settings in this application is by going to Transport, and then "Software Play-through (on/off)", and then make sure that this setting is disabled. If Audacity is okay, you can try checking the operating system settings and make sure that sound settings are enabled. You should also make sure that sound device drivers and firmware are up to date.
2. Echo or Delays When Listening To Recordings
This problem is usually caused by Software Playthrough. It causes a delay of the active recording input because of the amount of time that it takes before reaching your microphone. However, Software Playthrough has its benefits too. You will find it to be useful when the recording device and playback device are different.
To get rid of the echo or delays while listening to what you have recorded, you will simply need to turn off Software Playthrough. You can do this by going to Edit, and then Preferences, and then Recording, and then "Software Play-through (on/off)". Make sure that the tick is removed to turn off Software Play-through.
3. Recordings Fading Out or Sounding As If They are Recorded In a Hole
You are likely to get this problem when you are using Windows machines. It can also happen occasionally on newer Mac machines. It is usually because of the sound device of the machine that you are using trying to apply a corrective enhancement or effect on the audio file.
To solve this problem on a Windows machine, the following is what you will need to do.
Step1. Locate the Speaker icon on the computer and then right click on it.
Step2. Choose Recording Devices in order to open Recording tab of "Sound".
Step3. Right click over the microphone that you are using to record, and then choose Properties.
Step4. Look for the Enhancements tab and then disable the sound effects that may be contributing to the problem.
On a Mac PC, you will need to navigate to the Apple Menu, and then choose System preferences. After that, go to Hardware, and then Sound. Under the "Input" tab, make sure that the "Use Ambient Noise Reduction" check box is marked.
4. Track Not in Sync with Previous Ones
This problem occurs when you are trying to make on overdub recording, which simply refers to listening to a track while you are still recording another one. The computer cannot figure out what is being recorded at the exact same time that you sing to the beat. In an attempt to correct this latency, Audacity automatically pushes the track that is already recorded backwards when the recording process is over.
To fix this issue you will need to make sure that your sound device drivers' are up to date. You should also make sure that the sound drivers are specifically meant for the particular operating system or computer model that you are using. You can also fix this issue by going to Effects in Audacity. And then change the recording speed accordingly.
5. Recording Keeps Pausing Automatically
This problem might occur if "Sound Activated Recording" is enabled accidentally. It is found under the Transport Menu. It might also occur if the active recording input is set somehow below the required threshold level at which the recording must begin.
To solve this problem, you will simply need to make sure that "Sound Activated Recording" is disabled. To do this, you will need to go to Transport in the menu bar, and then look for "Sound-Activated Recording (on/off)". Make sure that it is off. You can also fix this issue by reducing the "Activation level" or increasing the recording level by going to Transport, and then Sound Activation Level.
iMusic is an all-in-one music manager tool, facilitating you to download music and playlists from over 3000 sites, transfer music among iPhone, iPad, iPod, iTunes and Android phones, record any audio you’re playing, clean up and fix iTunes Library (delete duplicate and broken tracks, get cover and tags, fix ID3 tag, etc). iMusic is a must-have music downloader and manager pro for music lovers to discover and download music, or backup and rebuild iTunes Library even from a Windows PC. iMusic has separate versions for both Windows PC and Mac, which is fully compatible with the latest Windows 10 and macOS 10.13 High Sierra.
iMusic - Best Audacity Alternative to Record Music from Any Music Sites
- Download music from more than 3000 music sites such as YouTube, Dailymotion, Vimeo, Vevo, Hulu, Spotify, and much more through copying and pasting the URLs.
- Transfer music between a computer, iPhone, iTunes Library, iPad, iPod and Android phones making it easy to share songs.
- Record music from radio stations and streaming sites and gets the identification of the songs including the title, album artist, and genre.
- It acts as a management toolbox that lets you manage iPad, iPod, iPhone and Android phones iTunes Library through options like backup iTunes, recover iTunes Library, fix iTunes music tags and covers as well as remove music DRM protection.
- 1 click to transfer downloaded music and playlist to USB drive to enjoy in car.
- Ability to burn downloaded songs and playlists to CDs easily.
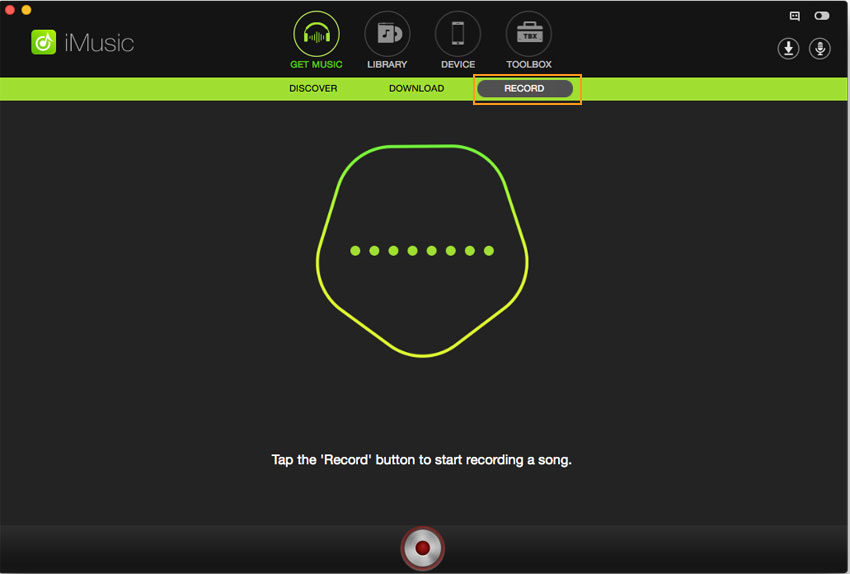
Step 1: First go to download iMusic and then install it on your Mac PC. After that, you will need to launch it, find the "Record" interface.
Step 2: Now, click on the big right button to get ready to record the music. Find the file that you would like to record the audio from, and then play it. The file could be on applications such as iTunes or Spotify, or it could on a web page. You can also record the audio directly from a microphone.
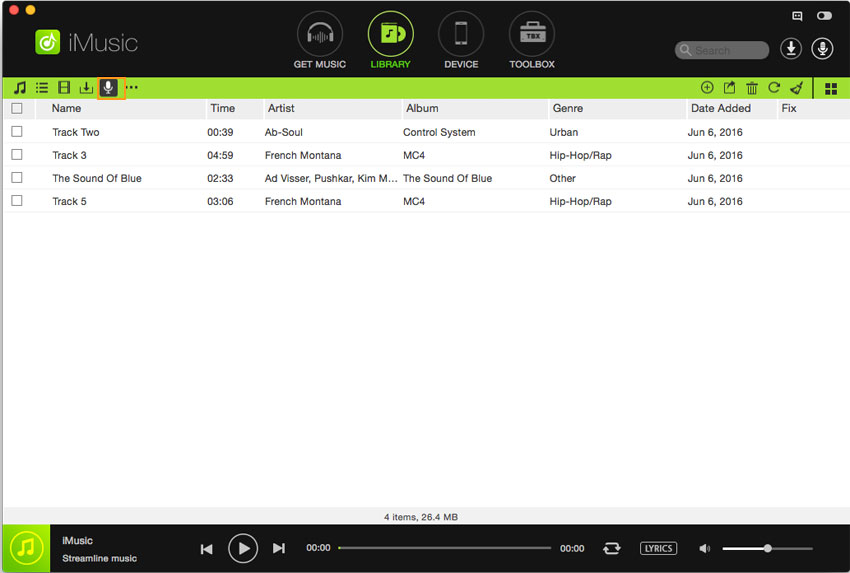
Step 3: When you play the music, the software will automatically detect the music and start recording it. Click "LIBRARY" menu, then the record icon on the left side to check out the recorded songs. They are all there. To add them to iPhone, iPod, iPad, and Android phones, check them > click export icon > select device to transfer (a device should be connected to the computer first).
Audio Recorder
- 1.1 Free Streaming Audio Recorder for Mac
- 1.2 Apple Music Recording Software
- 1.3 Free Audio CD Recorder Software
- 1.4 Free Audio Recorder Online Services
- 1.5 Audio Recording App for iPad& iPhone and Android
- 1.6 Free Recording Software for Mac /Windows
- 1.7 Free MP3 Recorder
- 1.8 Music Recording App
- 1.9 What Is the Music Recording Software
- 1.10 Video Recording Software for Mac and Windows
- 4.1 Audacity Apps for iPad& iPhone and Android
- 4.2 Audacity for Windows 10
- 4.3 Record Audio From Youtube With Audacity
- 4.4 Convert Audacity WMA to MP3
- 4.5 Audacity Multitrack Recording
- 4.6 Audacity Normalize Not Working
- 4.7 Audacity Keyboard Shortcuts
- 4.8 Audacity Stereo Mix Not Working
- 4.9 Make Sound Better in Audacity
- 4.10 Audacity Audio Recording and Editing
- 4.11 Audacity Midi Won't Play
- 4.12 Use Audacity to Edit and Record Video
- 4.13 Convert Audacity Flac to MP3
- 4.14 Tips on How to Use Audacity VST Enabler
- 4.15 FFMpeg Audacity Not Working
- 4.16 Troubleshooting on Using Audacity


Adam Cash
staff Editor
0 Comment(s)